Targeted Collection
- Login as an admin into the target Windows computer.
- Connect the LLIMAGER-win drive containing
LLimager.exeand the license key file (llimagerw.lic). - Connect the destination disk (as needed).
- On your USB drive, navigate to
\llimagerwand double-click*LLimager.exe, then select Targeted Collection from the Home screen.
Before You Begin
- Confirm you are logged in to the target Windows computer with valid local admin credentials.
- Targeted Collection module is available under all license types, including Trial.
Note: anchoring the resulting report's evidence hash to the LLSmartVerify blockchain is not performed by LLIMAGER-win itself — it happens through the LLSmartVerify Portal, typically after the report's QR code is scanned and registered via the LLIMAGER Companion mobile app.
Step-by-Step Walkthrough (Targeted Collection)
Step 1 — Start a New Acquisition
- Click the Targeted Collection icon on the Home screen.
- The evidence creation form for Targeted Collection will open. See screenshot below
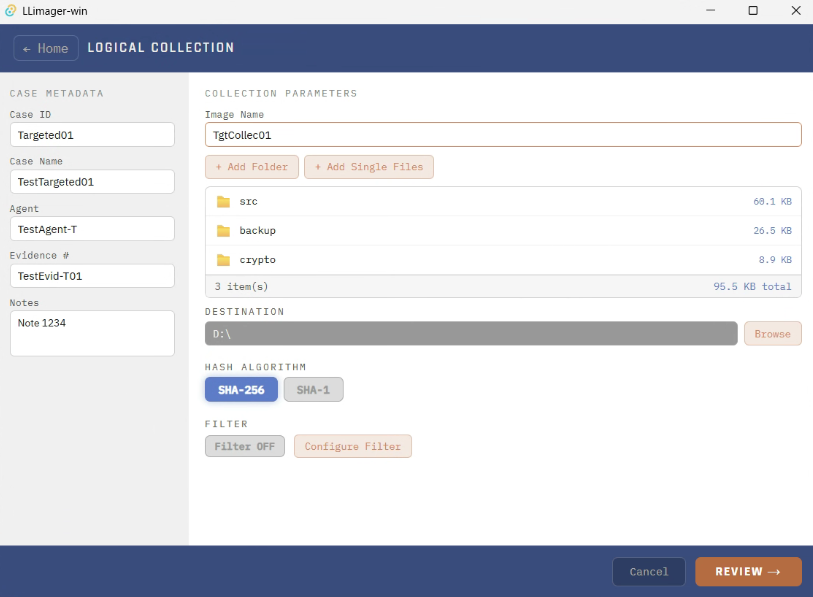
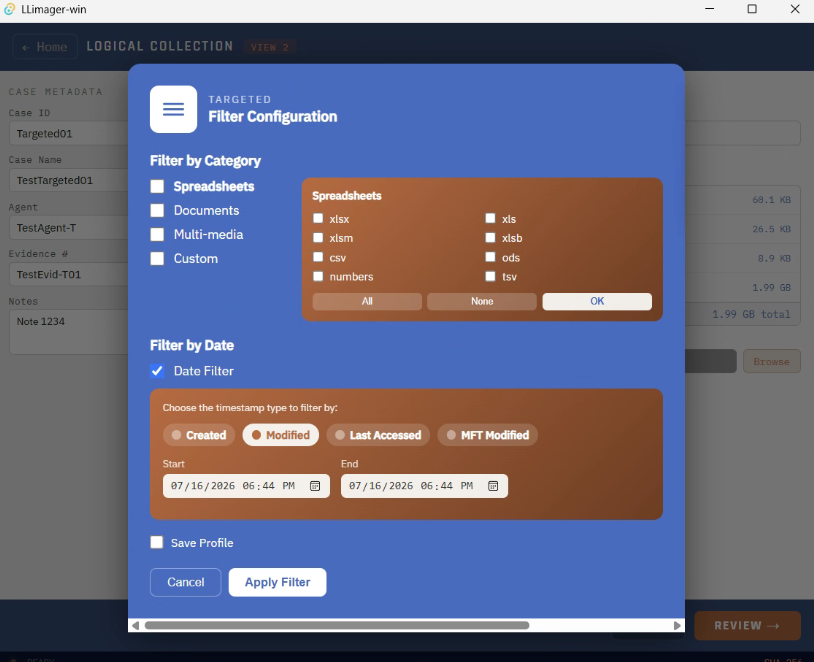
Granular selection is supported based on custom file types (extensions — spreadsheets, documents, multimedia, or custom) and file system dates (Created, Modified, Last Accessed, or MFT Modified).
Step 2 — Fill in Evidence Metadata
| Field | Description | Required |
|---|---|---|
| Case | Your organization's case name | No |
| Evidence | Unique evidence item identifier | No |
| Agent | Name of collecting officer / agent | No |
| Case ID | Your organization's case identifier | No |
| Notes | Additional context or observations | No |
Step 3 — Attach Evidence Files
Select the source files/folders to acquire and the destination path for the resulting ZIP archive. Choose the hash algorithm (SHA-256 or SHA-1).
Note: there are power-saving settings on the computer that may interfere with and break the imaging process; these are temporarily disabled during acquisition.
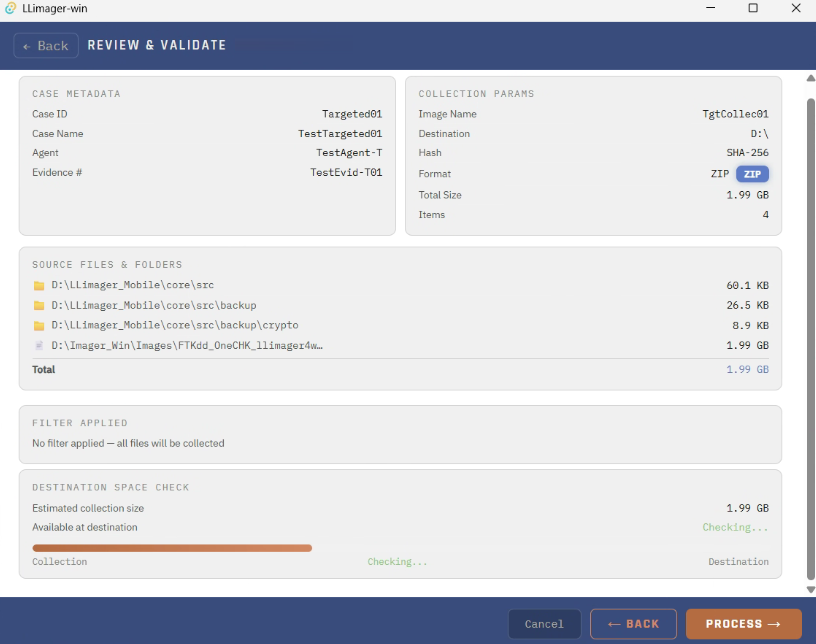
- Click Review to open the Review & Validate screen.
- Confirm the summary, which includes:
- Case Metadata — Case ID, Case Name, Agent, Evidence #.
- Collection Params — image name, destination, hash algorithm, output format (ZIP), total size, and item count.
- Source Files & Folders — the full list of selected items with individual sizes and a running total.
- Filter Applied — a summary of any extension/date filters, or a note that no filter was applied and all files will be collected.
- Destination Space Check — estimated collection size versus available space at the destination.
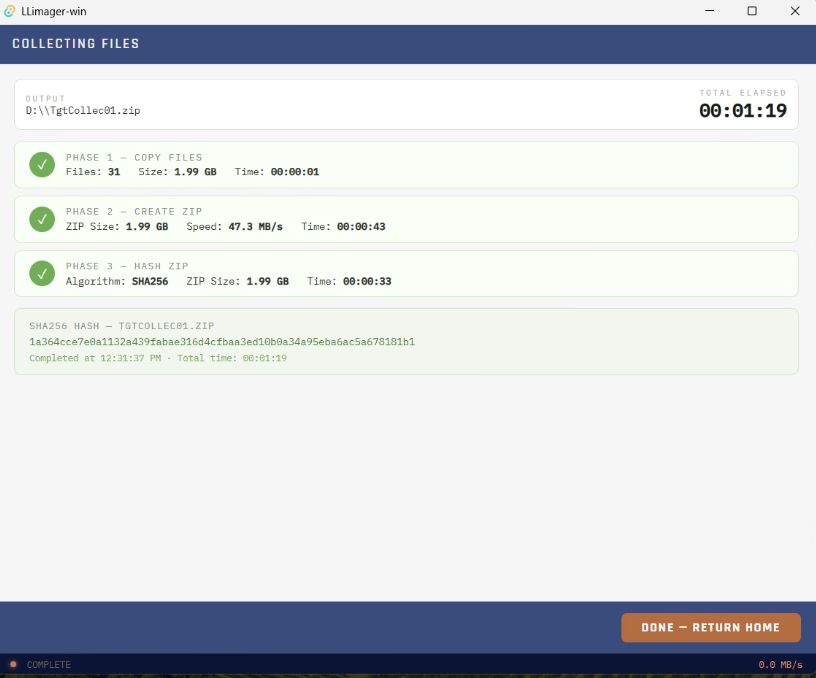
- Click Process to begin. The Collecting Files screen displays three sequential phases, each with a circular progress gauge, current file, transfer speed, and elapsed time:
- Phase 1 — Copy Files (files copied, MB/s)
- Phase 2 — Create ZIP (ZIP size, MB/s)
- Phase 3 — Hash ZIP (bytes hashed, MB/s)
- On completion, the calculated hash value is displayed, along with completion time and total duration. A signed, tamper-evident PDF acquisition log is generated automatically.
Targeted Collect files view
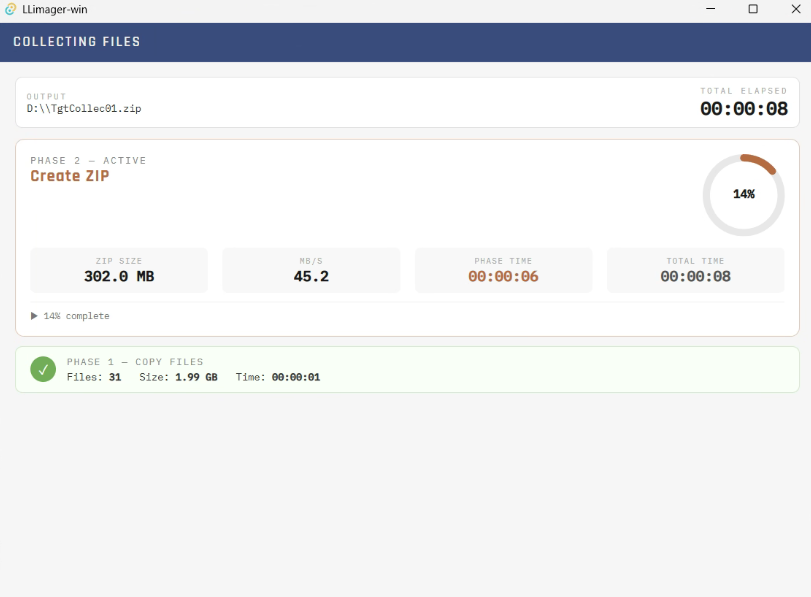
Once Collected, files are place in a container (ZIP)
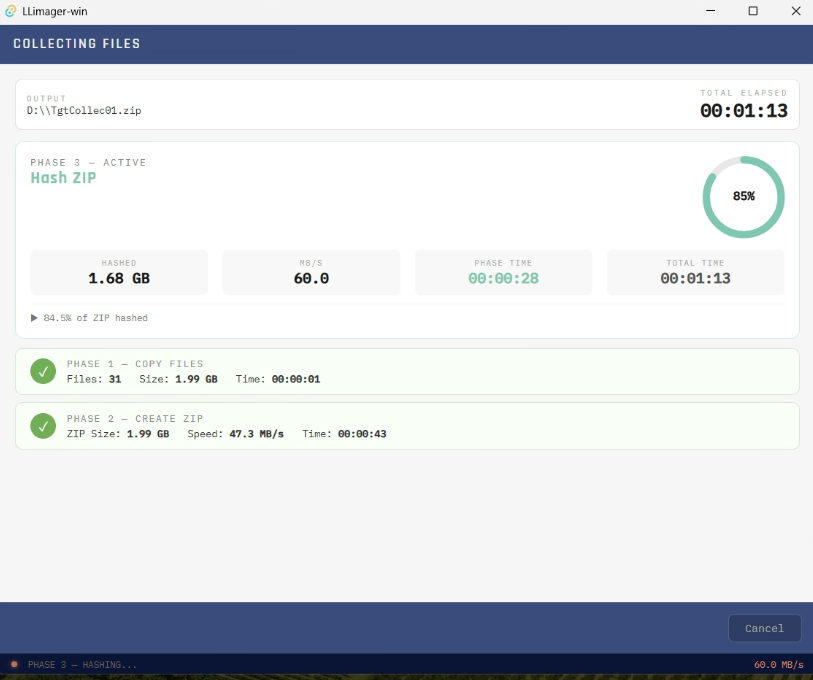
The Container is then hashed and the calculated hash is placed in a QR at end of the secured PDF report.