Installation / Getting Started with LLIMAGER
Refer to the pertinent scenario below.
USB SSD/HDD Version
- Login as an admin into the target Mac computer and connect the LLIMAGER USB SSD drive that contains the copy of the imager (llimager.app, manual and license key file).
- Connect the destination disk(s) – refer to Requirements section for details on options and best practices.
- Open Finder to identify the destination USB volume names for the sparse image, and for the DMG by opening Finder.
- On the LLIMAGER USB SSD, navigate to /llimager and double click on “llimager.app”.
- Proceed to image.
User-Supplied USB SSD/HDD Version
Prepare LLIMAGER on a Window Computer:
- Inserting an SSD into a Windows computer and create an exFAT partition named “llimager” (case sensitive). This can be a relatively small partition, e.g., 35GB.
- Create a folder named “llimager”, which when mounted on a mac, should result in “/Volumes/llimager/llimager” and on Windows “\llimager”.
- Download the most current version of LLIMAGER from “www.llimager.com/download” and unzip into “/llimager”
- Optional: If you plan to use the “Send To Cloud” feature to copy images to AWS, Google Cloud or Azure, you will need the Cloud Library, and must download the most current version from “www.llimager.com/download” and unzip into the “/llimager” folder which should appear as “/llimager/llimagerCloudServices/” (case sensitive).
- Copy the purchased license file (llimager.lic) into “\llimager”.
- Your disk is now properly loaded, and you can open the manual or download it from “llimager.com/resources/llimager-manual”
Prepare LLIMAGER on a Mac Computer:
- Download the LLIMAGER Mac installer (LLinstaller.zip) from the Download page https://www.llimager.com/download and unzip and you should have “LLinstaller.app”.
- Insert your User-Supplied USB SSD and run LLINSTALLER.app that was downloaded and follow these instructions.
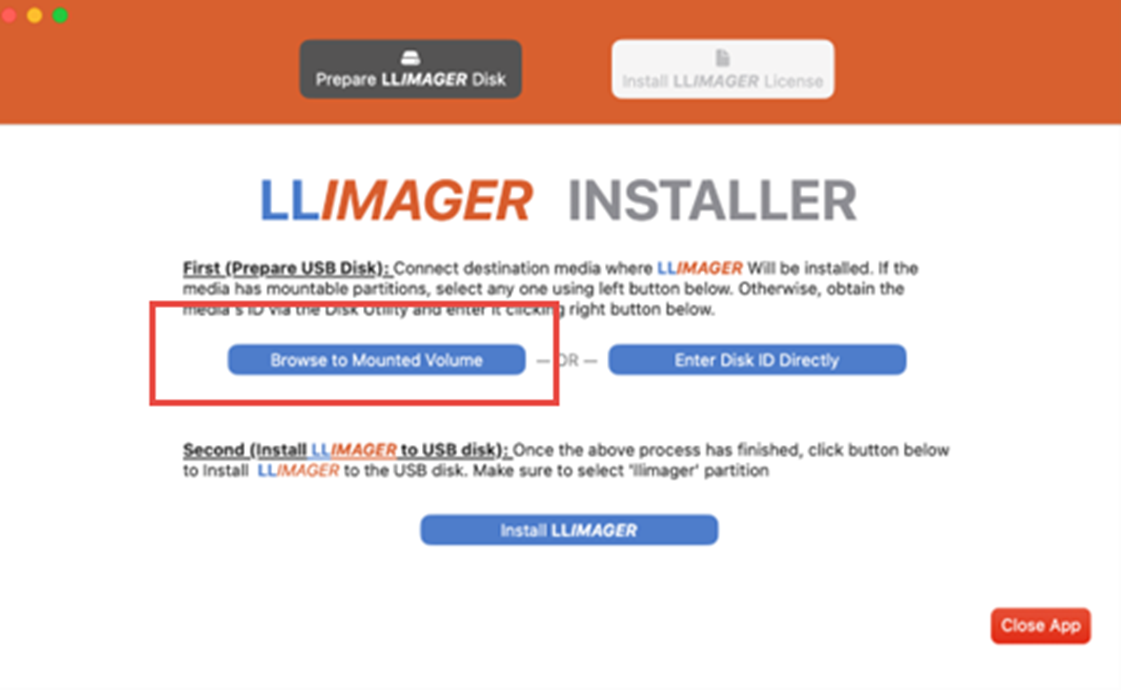
Run LLINSTALLER:

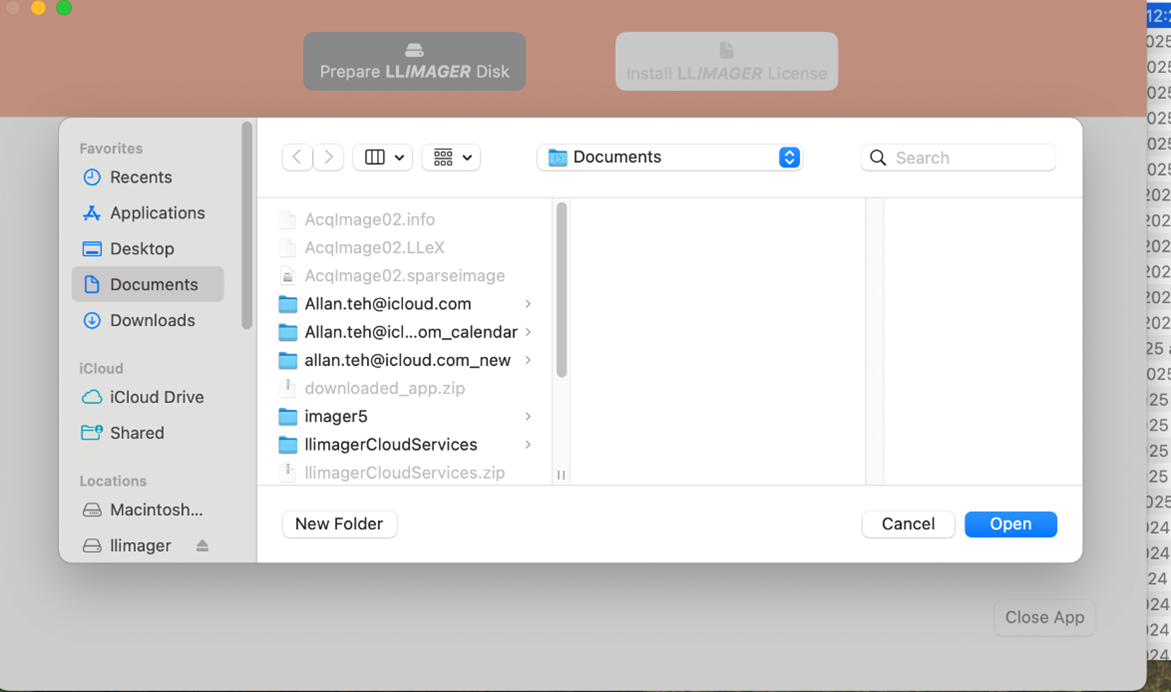
- Select “Browse to Mounted Volume” and choose any partition on it. Note, this process will destroy all data on the disk. Thereafter, confirm the Format option and Format; see below.
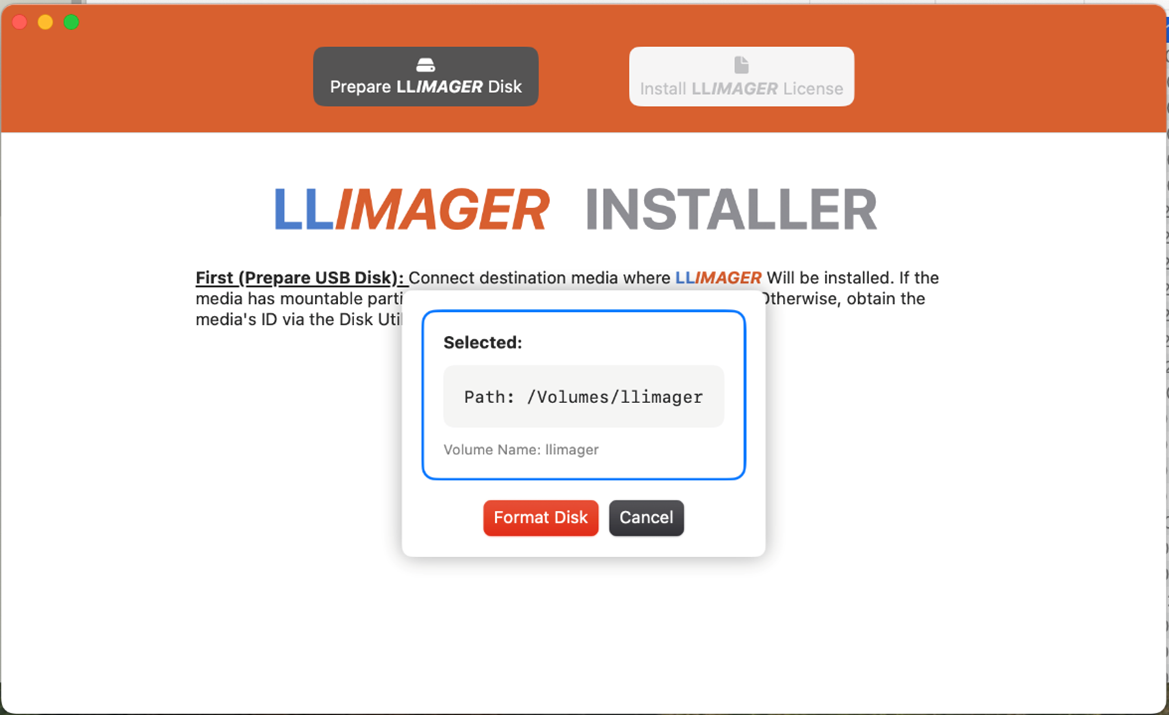
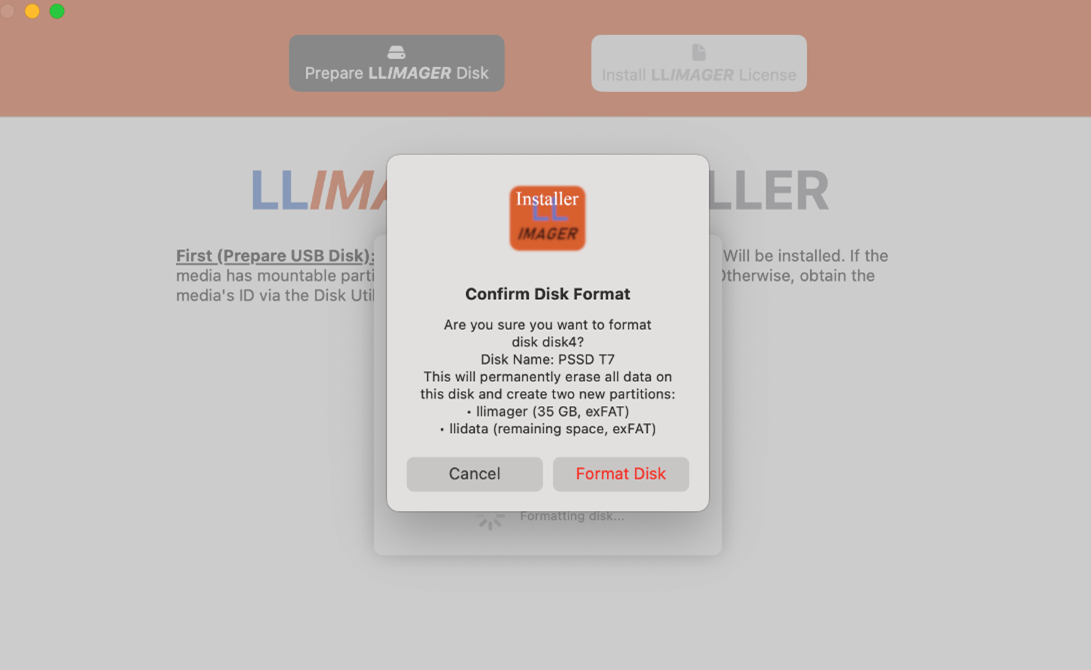
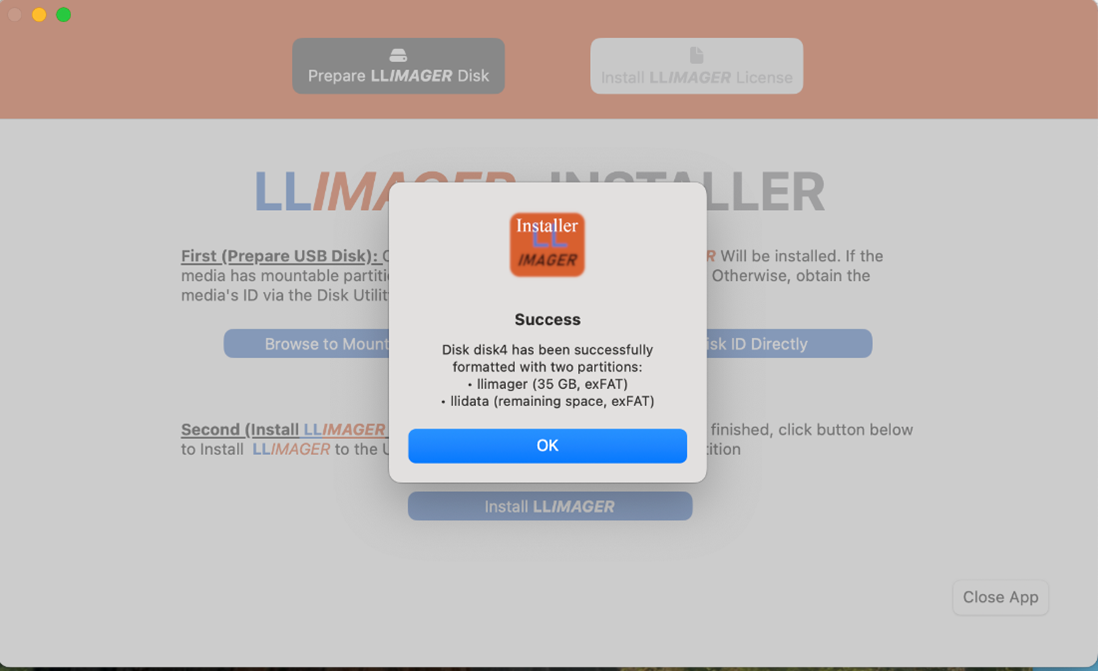
- This disk is now ready for LLIMAGER.
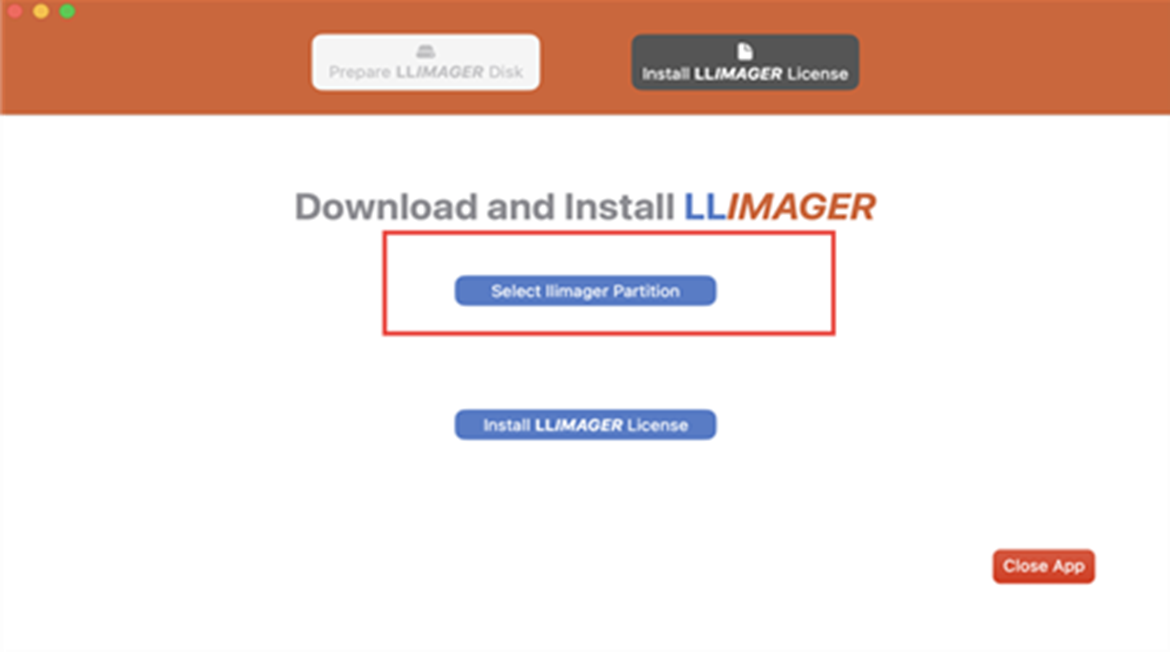
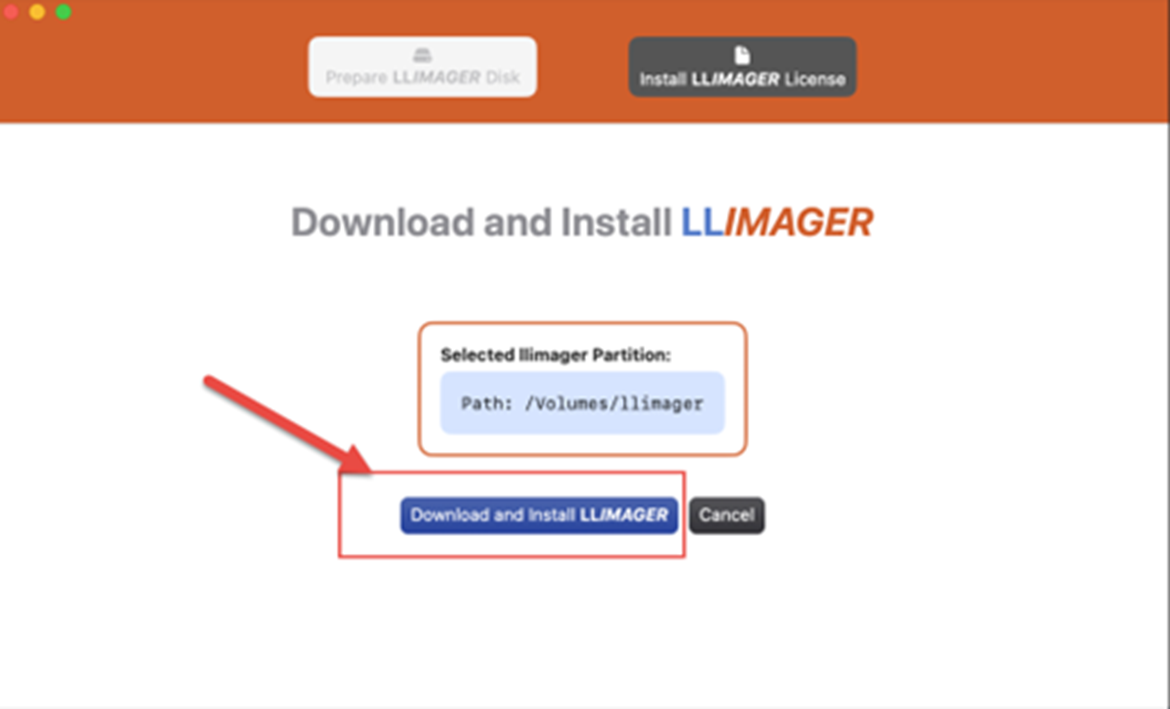
- Select, “Select llimager Partition” and point to any partition (llimager or llidata) on the newly prepared disk and choose the “Download and Install LLIMAGER” button. Upon completion, the disk will be prepared; see below.

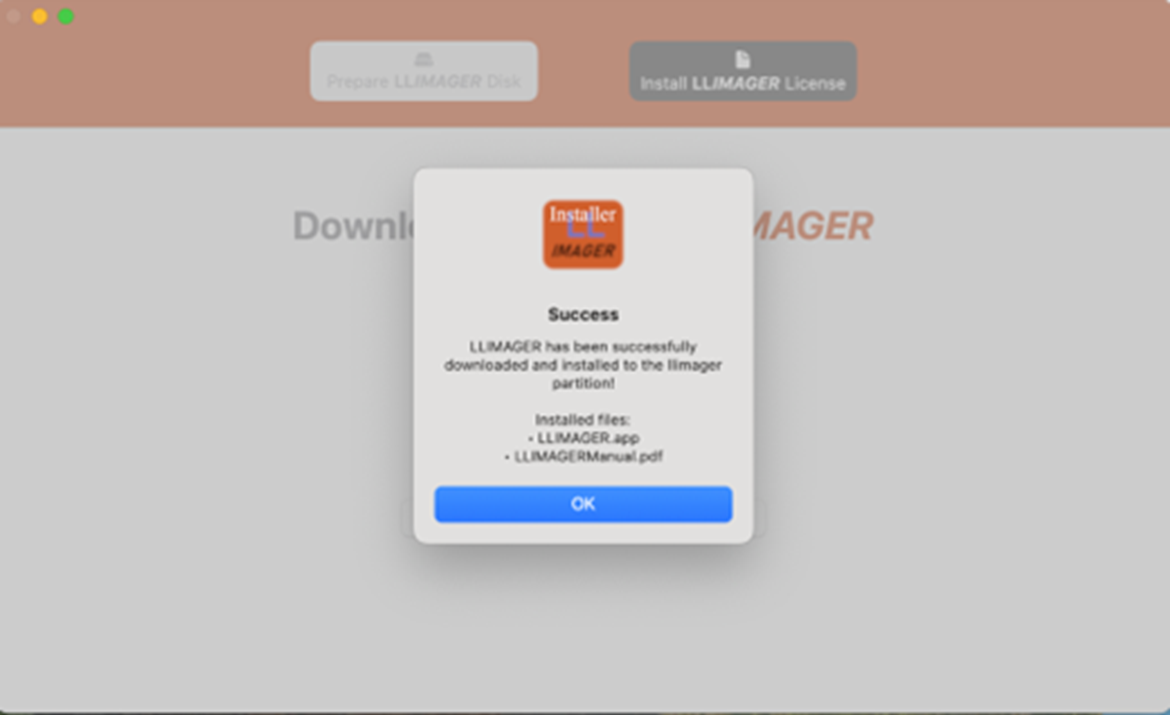
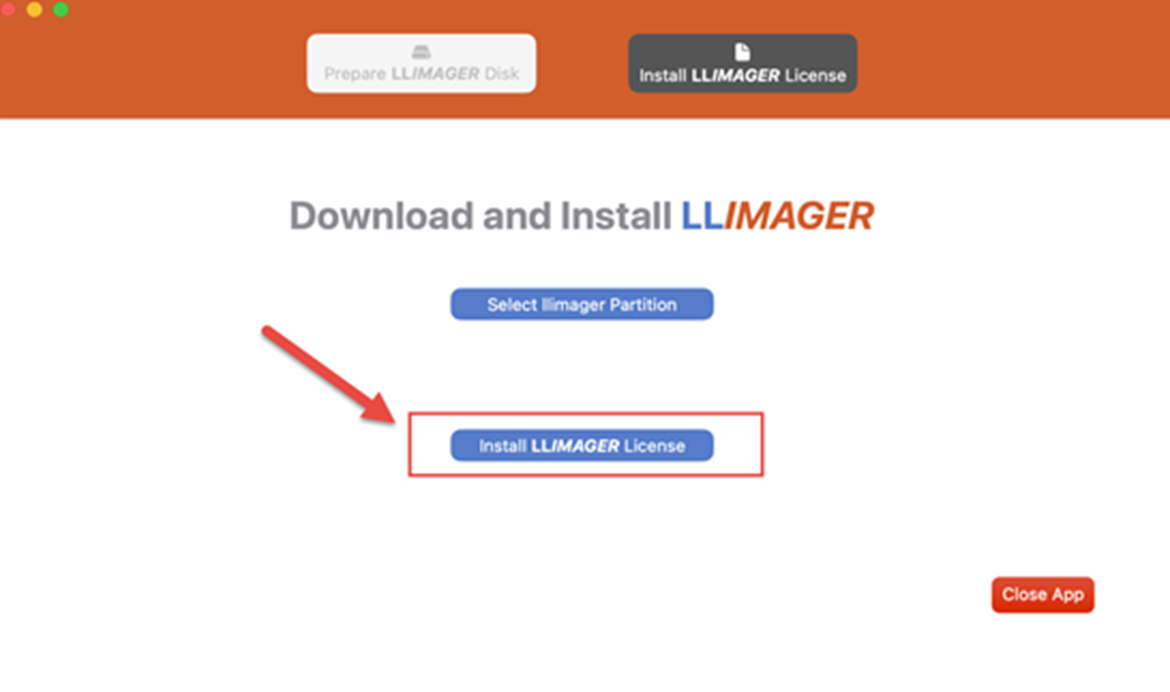
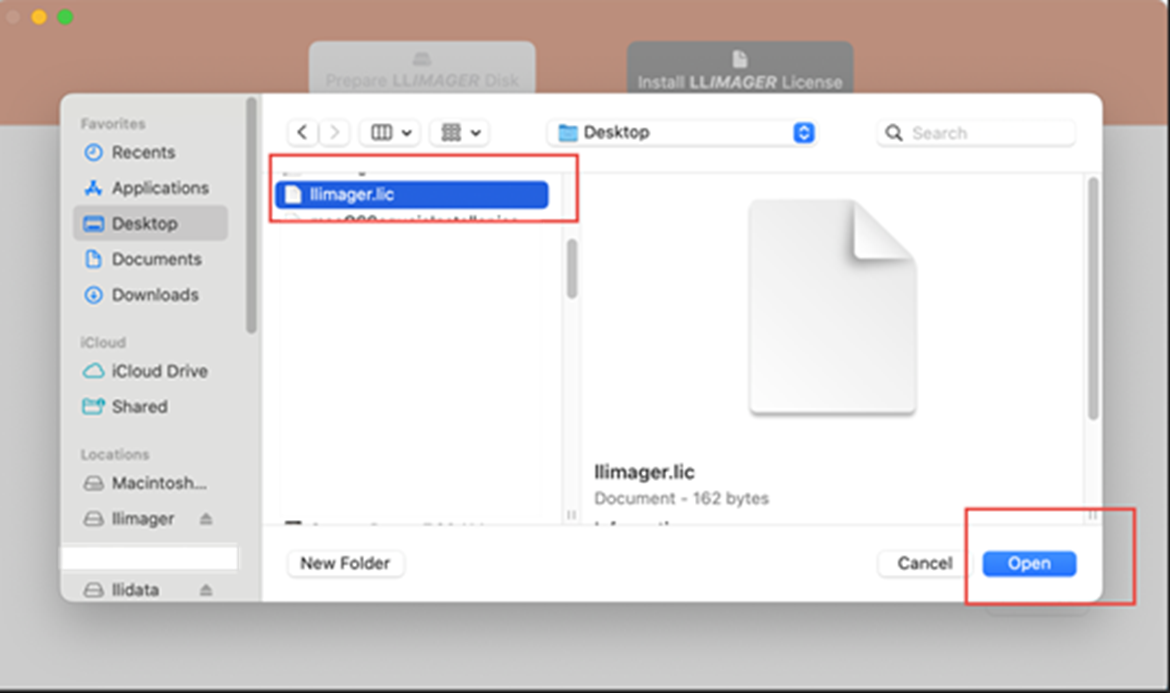
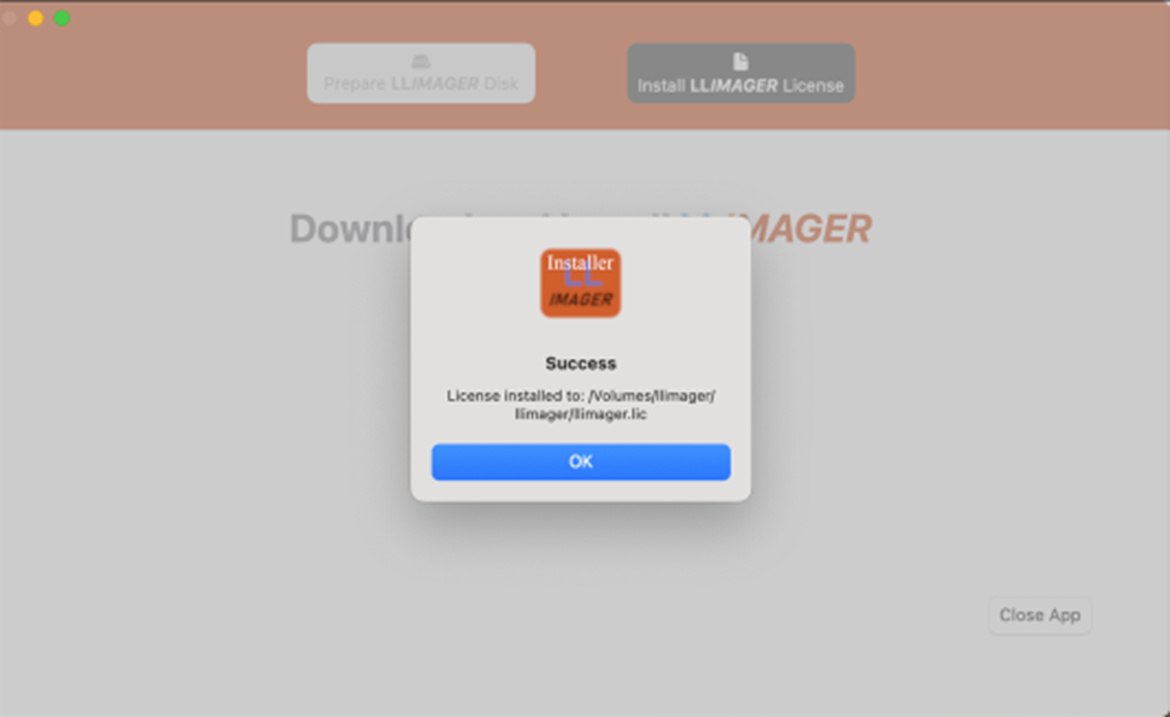
- After clicking OK, it is time to apply the license file which should be in your possession. Select “Install LLIMAGER License” and point to the purchased or trial license file and click open.
- Login as an admin into the target Mac computer.
- Connect the user-supplied USB SSD drive that contains the copy of the imager (llimager.app, manual and license key file).
- Connect the destination disk(s) – refer to Requirements section for details on options and best practices.
- Open Finder to identify the destination USB volume names for the sparse image, and for the DMG by opening Finder.
- On your USB SSD, navigate to /llimager and double-click on “llimager.app”.
WARNING: if you receive an error message, “llimager.app is damaged and can't be opened” or “The application “LLIMAGER” can’t be opened” you have run into a mac quarantine issue and you need to reload the software from a Windows computer; see FAQ #1 on our website.
- Proceed to image.
Trial Version (Preparing LLIMAGER on Windows)
- Login to a Windows computer.
- Download the trial from “llimager.com/trial-1” on to the internal disk and after receiving the license file (llimager.lic) from e-Forensics, you are ready to proceed.
- Prepare your USB Flash or SSD by:
- Insert Flash/SSD into a Windows and create a small (~35GB) exFAT partition named “llimager” (case sensitive)
- Create a folder named “llimager”, which should result in “\llimager”
- While in Windows, download the most current version of LLIMAGER from “llimager.com/download” and unzip into “\llimager”
- Copy the trial license file (llimager.lic) into “\llimager”.
- Your trial version disk is now properly loaded, and you can open the manual or download it from “llimager.com/resources/llimager-manual”
- Login as an admin into the target Mac computer.
- Connect your USB Flash/SSD drive that contains the trial copy of the imager (llimager.app, manual and license key file).
- Connect the destination disk(s) – refer to Requirements section for details on options and best practices.
- Open Finder to identify the destination USB volume names for the sparse image, and for the DMG by opening Finder.
- On your USB Flash/SSD, navigate to /llimager and double-click on “llimager.app”.
WARNING: if you receive an error message, “llimager.app is damaged and can't be opened” or “The application “LLIMAGER” can’t be opened” you have run into a mac quarantine issue and you need to reload the software from a Windows computer; see FAQ #1 on our website.
- Proceed to image.
Trial Version (Preparing LLIMAGER on a Mac)
- Login to a Mac computer with internet access.
- Download the trial from “llimager.com/trial-1” on to the internal disk and after receiving the license file (llimager.lic) from e-Forensics, you are ready to proceed.
- Prepare your USB Flash or SSD by following the instructions “Prepare LLIMAGER on a Mac Computer“ above.
- Login as an admin into the target Mac computer.
- Connect your USB Flash/SSD drive that contains the trial copy of the imager (llimager.app, manual and license key file).
- Connect the destination disk(s) – refer to Requirements section for details on options and best practices.
- Open Finder to identify the destination USB volume names for the sparse image, and for the DMG by opening Finder.
- On your USB Flash/SSD, navigate to /llimager and double-click on “llimager.app”.
WARNING: if you receive an error message, “llimager.app is damaged and can't be opened” or “The application “LLIMAGER” can’t be opened” you have run into a mac quarantine issue and you need to reload the software from a Windows computer; see FAQ #1 on our website.
- Proceed to image.
NOTE: What to do if a window pops up with the message “llimager cannot be opened because it is from an unidentified developer” or any other message related to security restrictions.
Temporarily disable Gatekeeper and try running the app again. Once the imaging is completed, exit the application, and re-enable Gatekeeper. To disable, or re-enable Gatekeeper, open a Terminal window, and use one of the following commands accordingly to disable/enable, an admin password is required:
-
sudo spctl --master-disable -
sudo spctl --master-enable